My modified IBM 5150#
About a year ago, I had the nice opportunity to buy an IBM 5150 for 750 euros. While that might seem like a steep price at first, it was well justified: the previous owner had done extensive restoration work, including replacing all the capacitors and treating the PCBs in an ozone chamber. The ozone treatment helps to remove organic contaminants—like dust, grease, and mold residues—from the circuit boards, reducing corrosion and improving long-term reliability.
The machine came equipped with the original IBM 5151 monitor, the latest motherboard revision, 640 KiB of memory, the original MDA graphics card, a 5.25” 360 KiB floppy disk drive, and a 20 MiB Seagate hard drive including its own controller. Clearly, this setup was already an upgrade over the stock IBM 5150, which originally came with just 64 KiB of memory and two 180 KiB floppy drives. Over the past year, I have made a number of additional modifications to the machine on top of what was already there, which I will describe here.
Hard drive#
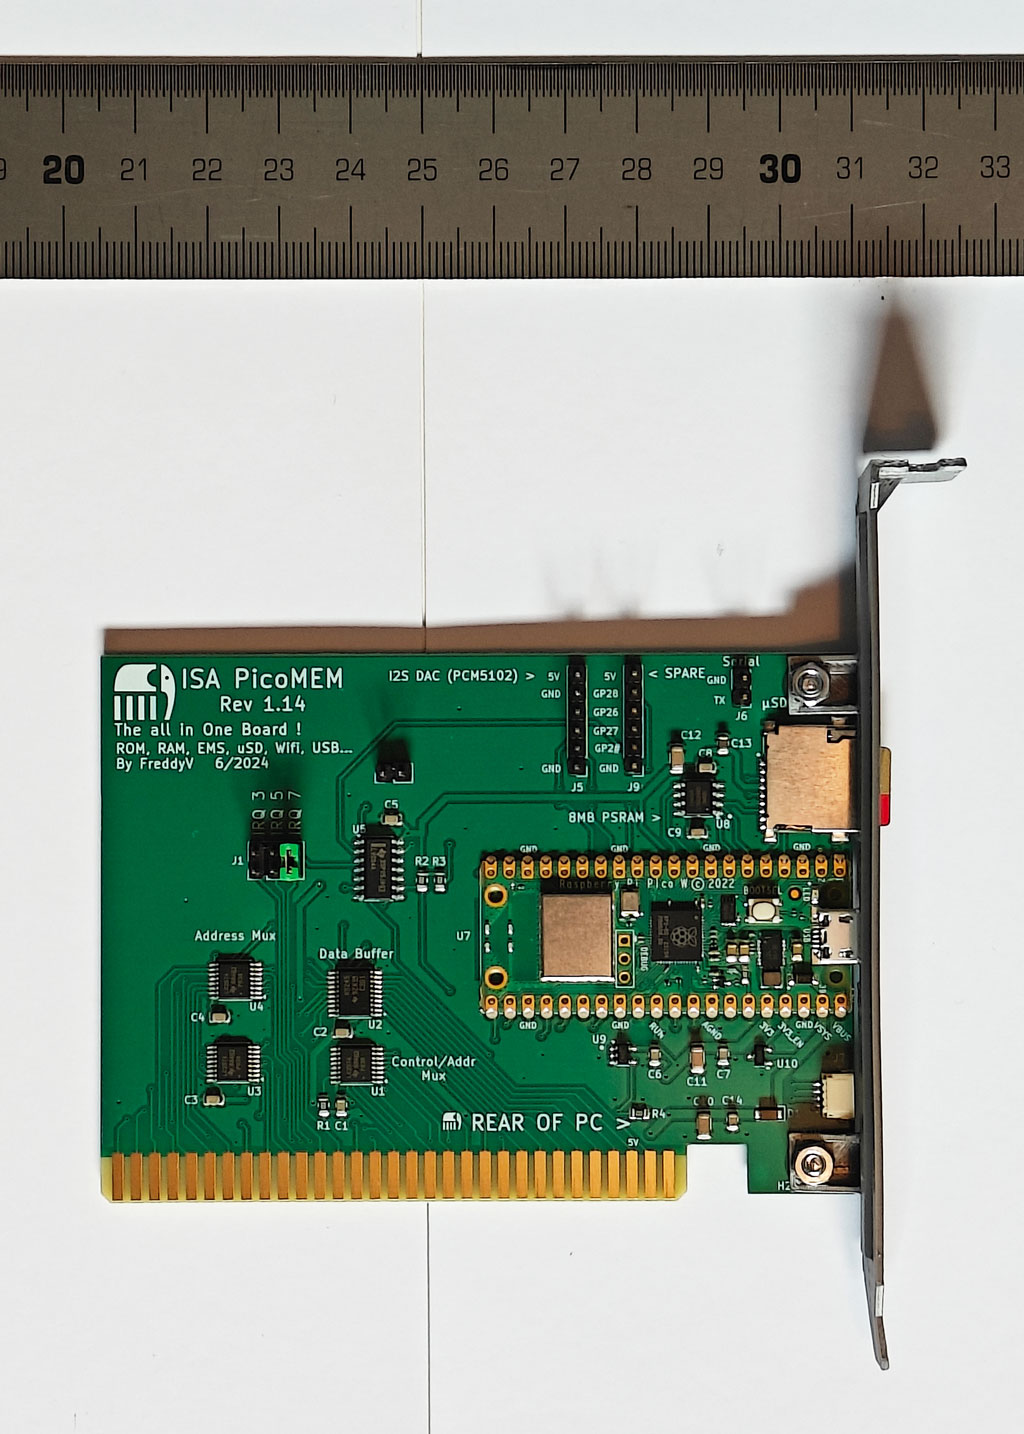
Although the 20 MiB seagate drive is very nostalgic and given the size of typical software made in the day quite large, yet it is also very loud. When spinning, the sound reminds me of a turbine. Furthermore, due to the moving components, these hard drives will not last and at some point will fail. As such, I replaced the drive with a ISA card replacement in the form of the PicoMEM. This card runs on a Raspberry Pi Pico (which admittedly has significantly more computing power than the whole machine) and can emulate a number of peripherals. I currently only use it for emulating a hard drive, which gives me a ridiculous amount of (fast!) storage.
Gotek floppy drive emulator#
What goes for the hard drive also goes for the floppy drive. It contains mechanical components and as such I also like to replace it with a modern replacement. There are number of floppy drive emulators available, the most well-known probably the Gotek and the HxC. I chose the former although I did test with the latter and both work nicely. What is nice about these floppy drive emulators over an original floppy drive is the ease of transferring files over. I create a floppy image file on my modern machine, put it on the SD card, transfer it to the IBM 5150 and I have my files. I also use the emulator as the main method for installing new software. The emulator connects directly to the original floppy drive controller (see image below) using a standard 34-pin ribbon cable, just like a real floppy drive. This makes installation straightforward. No special adapters or modifications are needed.
Hercules graphical card#
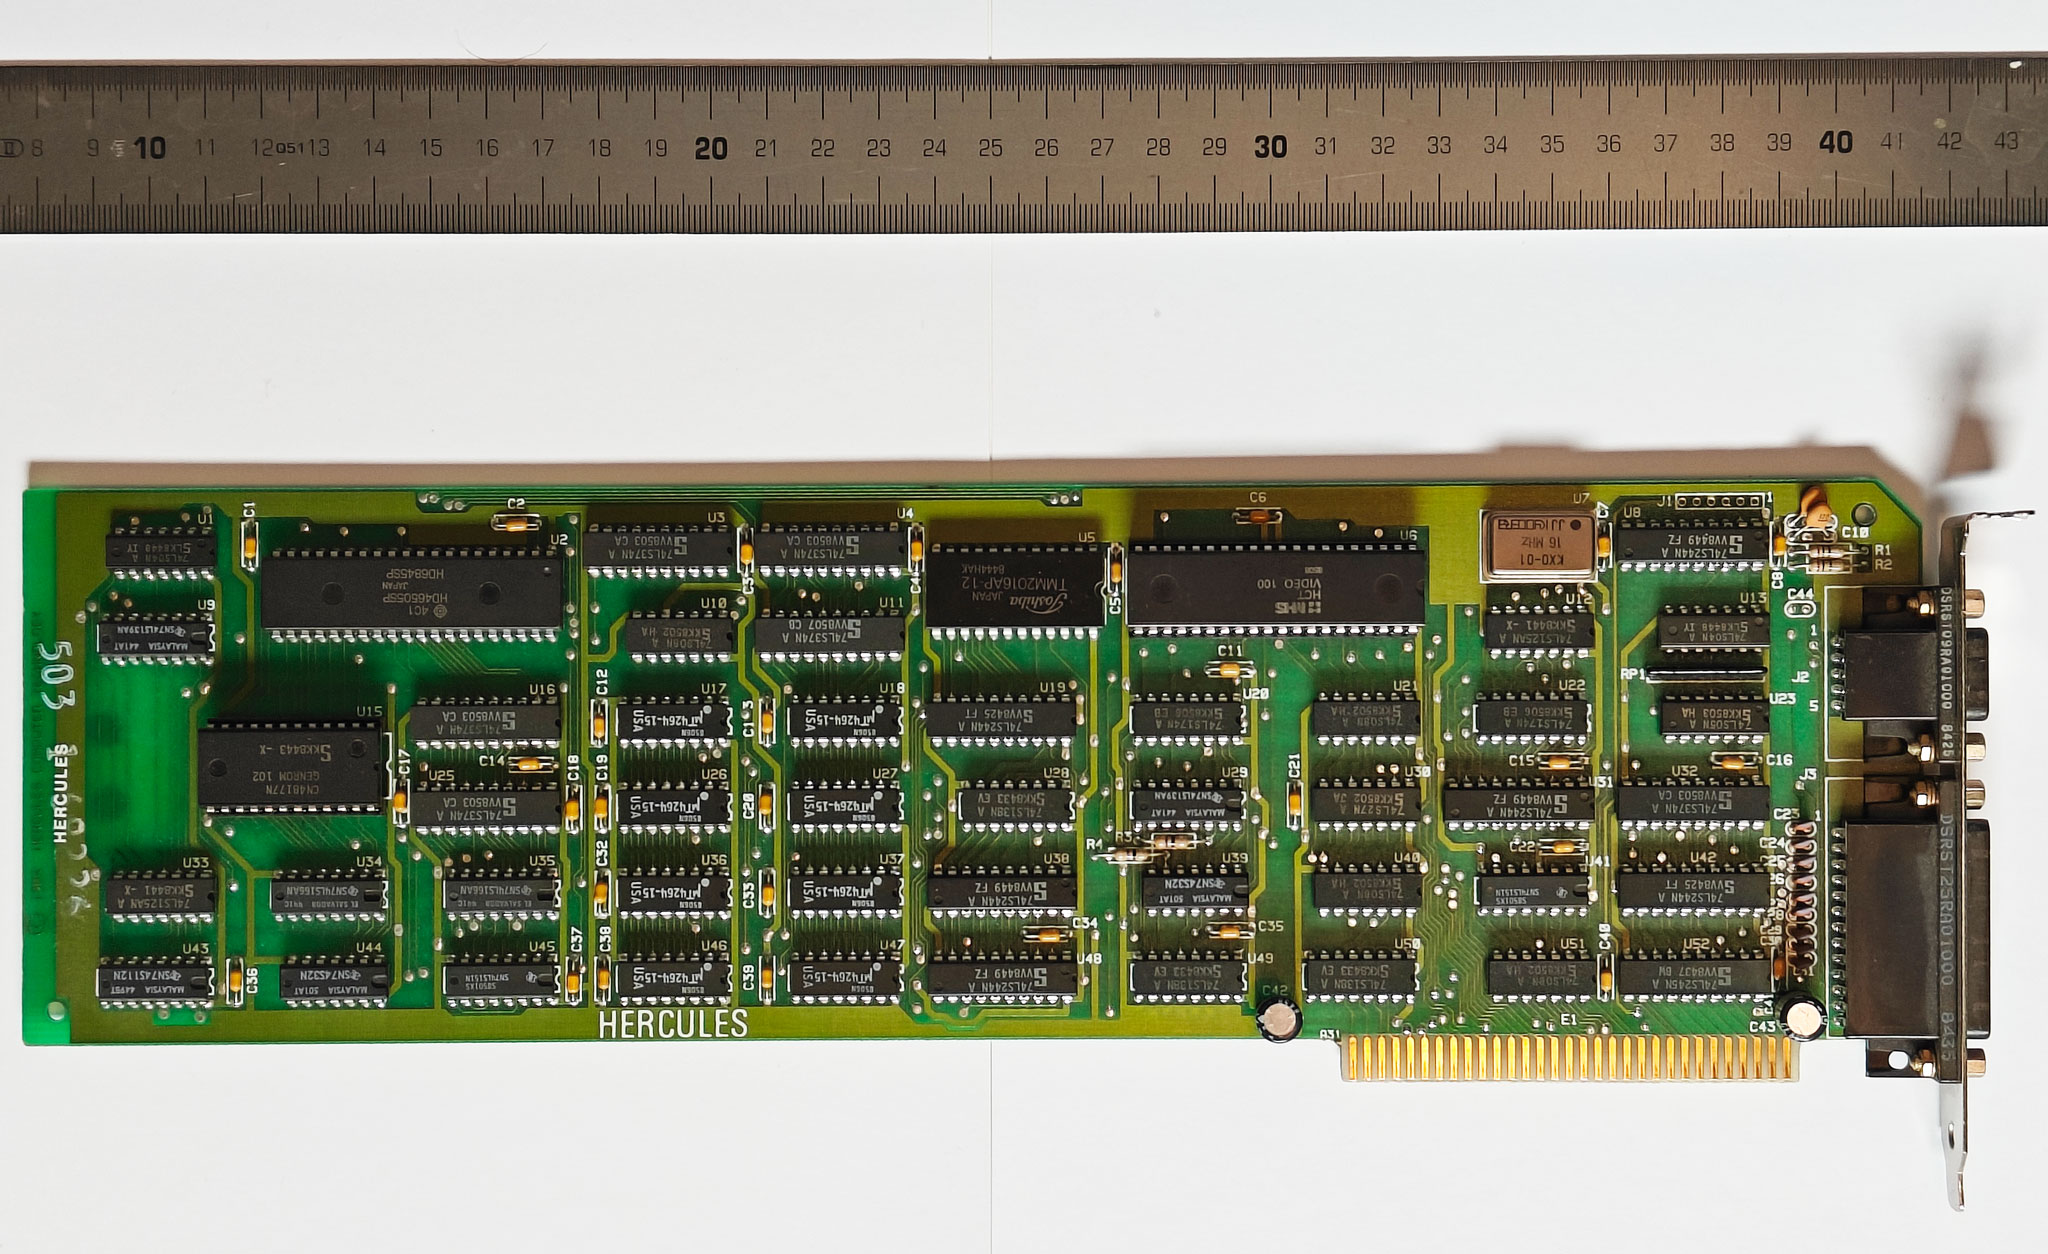
The original MDA card in the IBM 5150 only supports text mode; it has no bitmap graphics capability. Since the 5151 monitor is strictly monochrome (one color, no grayscale), there is little point in upgrading to CGA or EGA, which rely on color for their graphics modes.
The only natural upgrade, then, is to a Hercules Graphics Card. It maintains full compatibility with the 5151 and MDA text mode, but crucially adds a high-resolution monochrome bitmap mode (720x348). This gives me the ability to run software that needs graphics—without abandoning the original look and feel of the system.
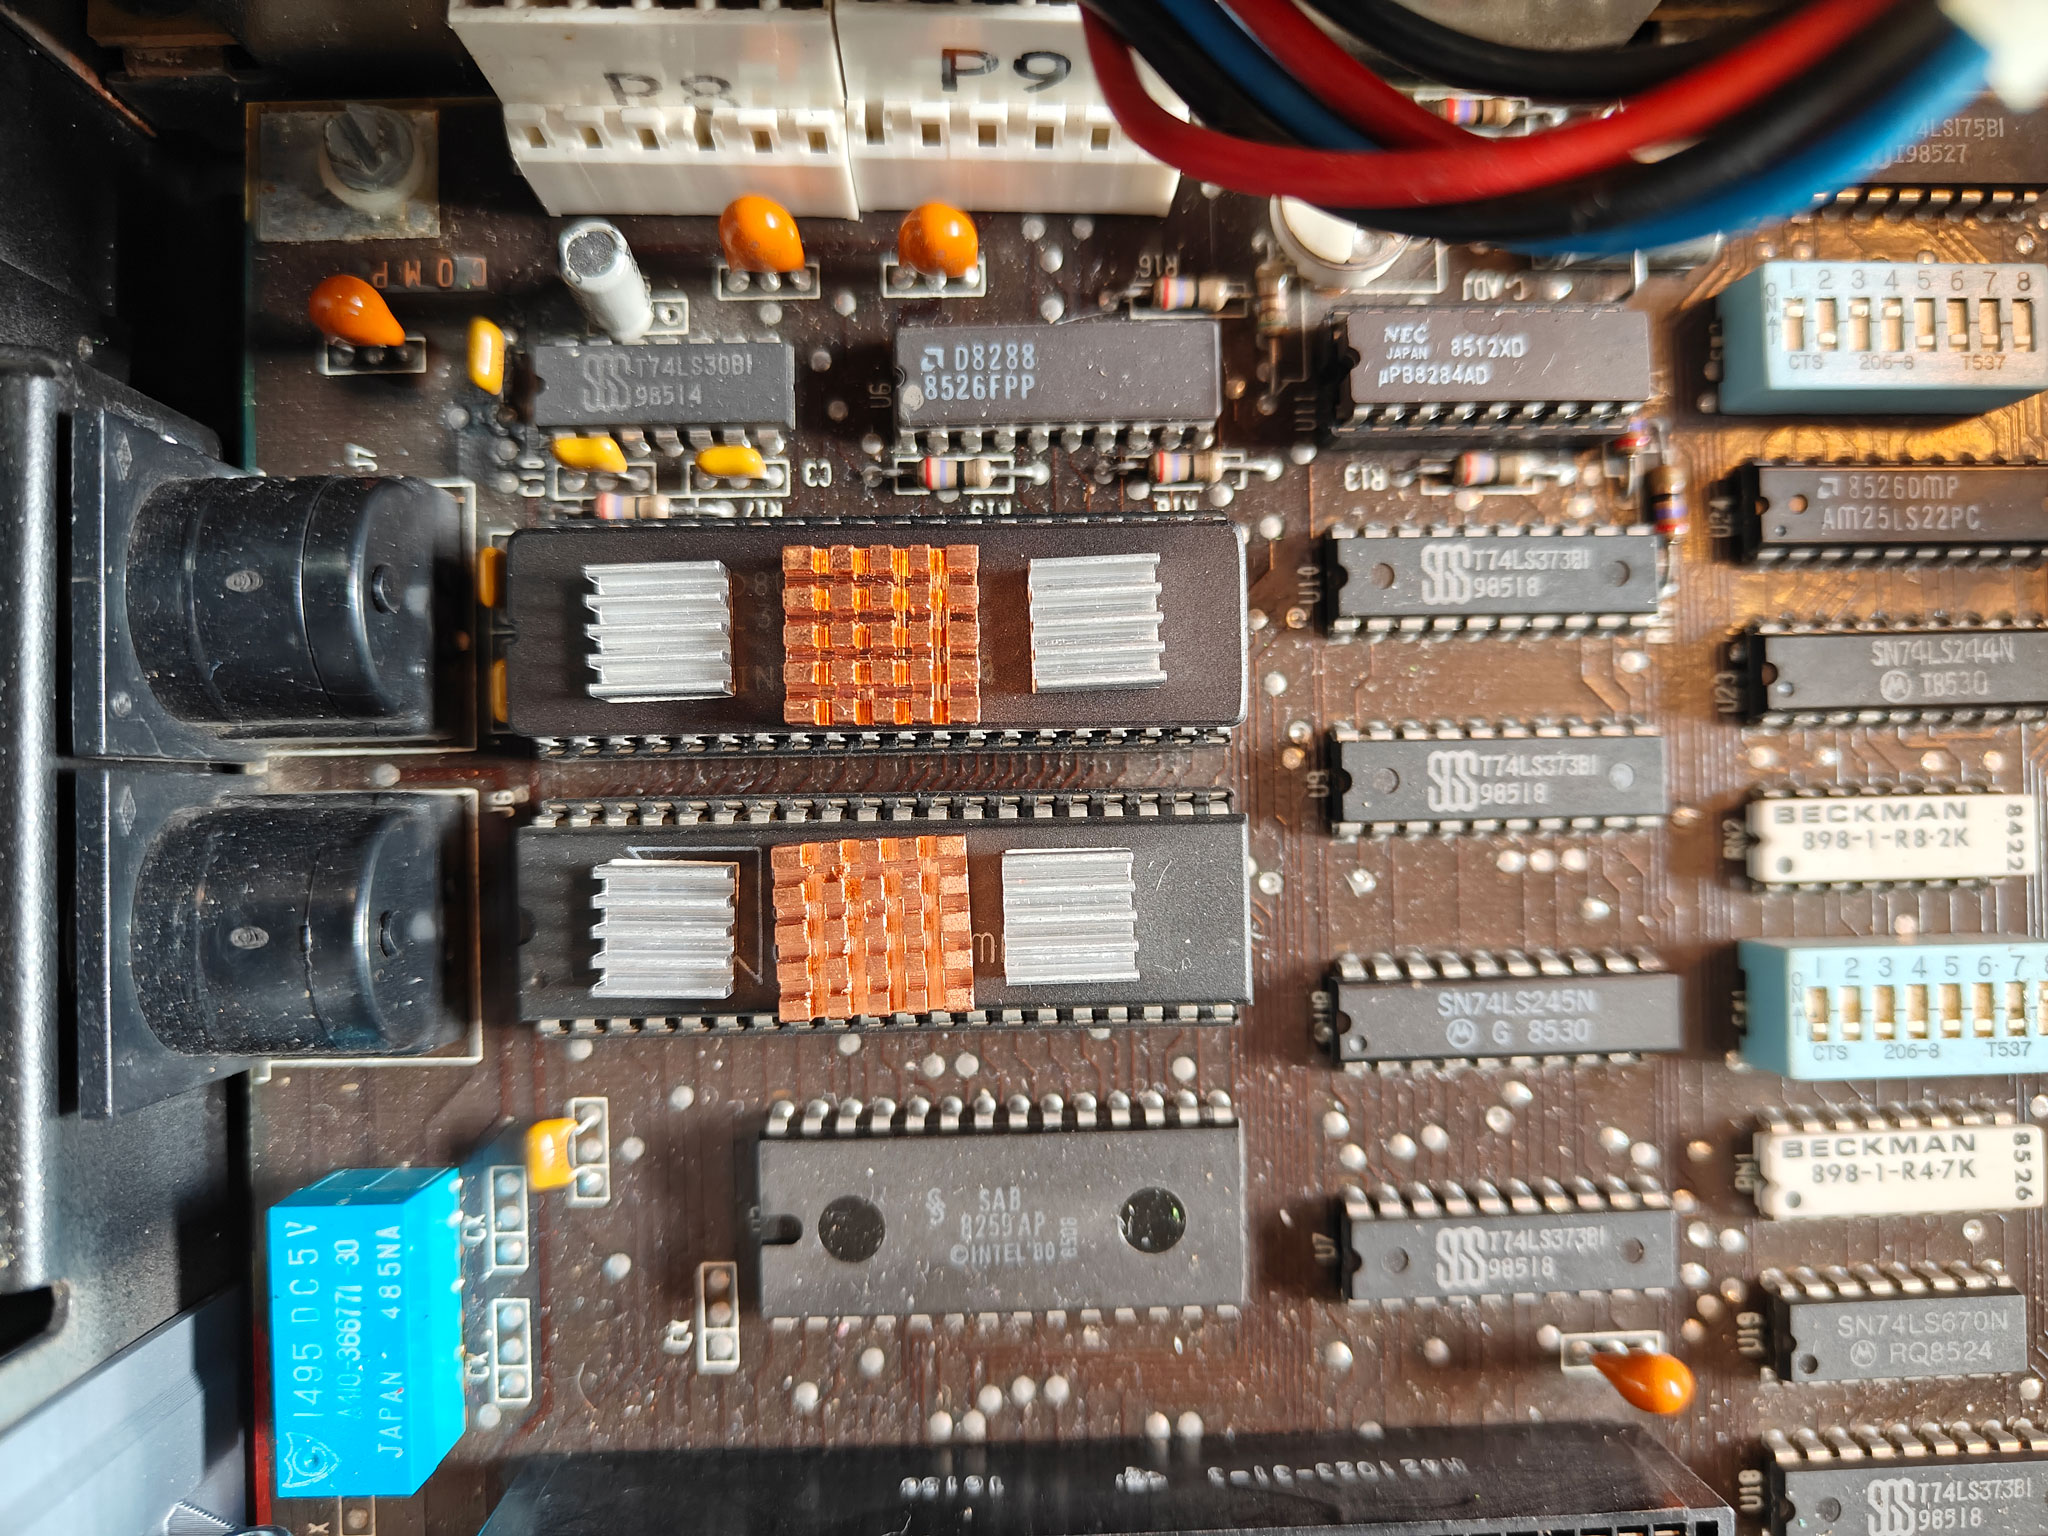
8087 Math Coprocessor#
The IBM 5150’s processor is an Intel 8088, which interfaces with the system over an 8-bit data bus, despite being a 16-bit processor internally. It supports only integer instructions, so any operations involving floating point numbers must be emulated in software - an inherently slow process. For faster mathematical performance, especially in scientific or engineering applications, an 8087 math co-processor can be installed. The 8087 executes dedicated floating-point instructions in hardware, dramatically accelerating calculations that would otherwise bog down the main CPU. In the image below, you find both processors. I have added heatsinks to the both of them as they run relatively hot.
Memory#
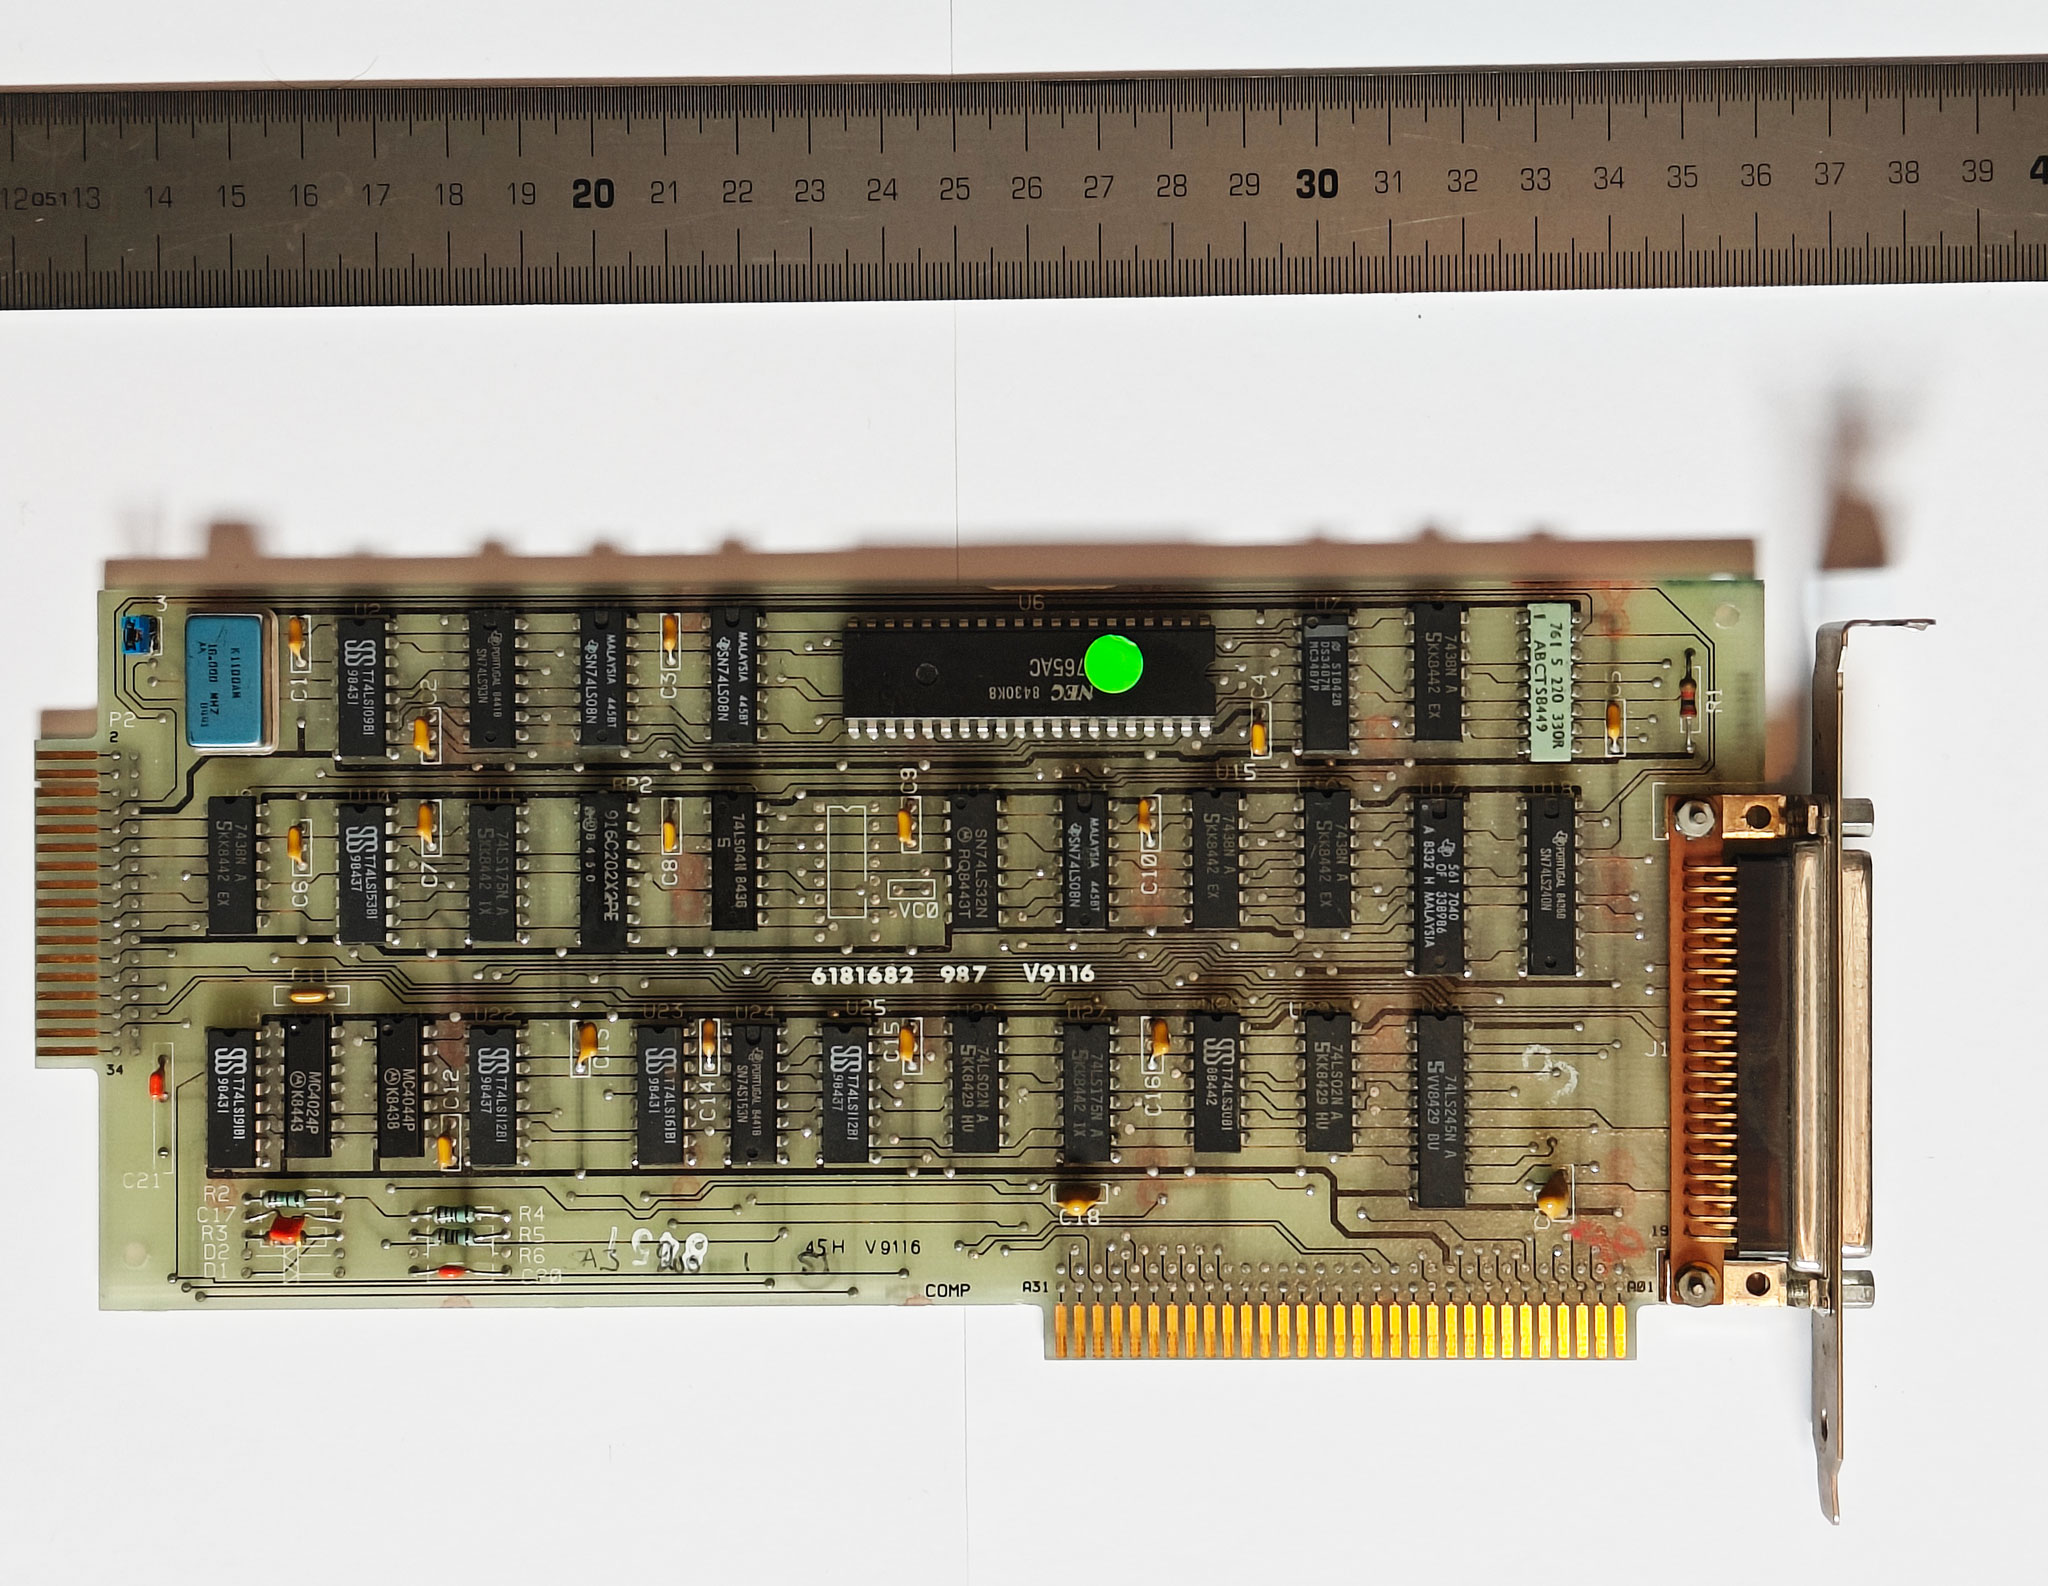
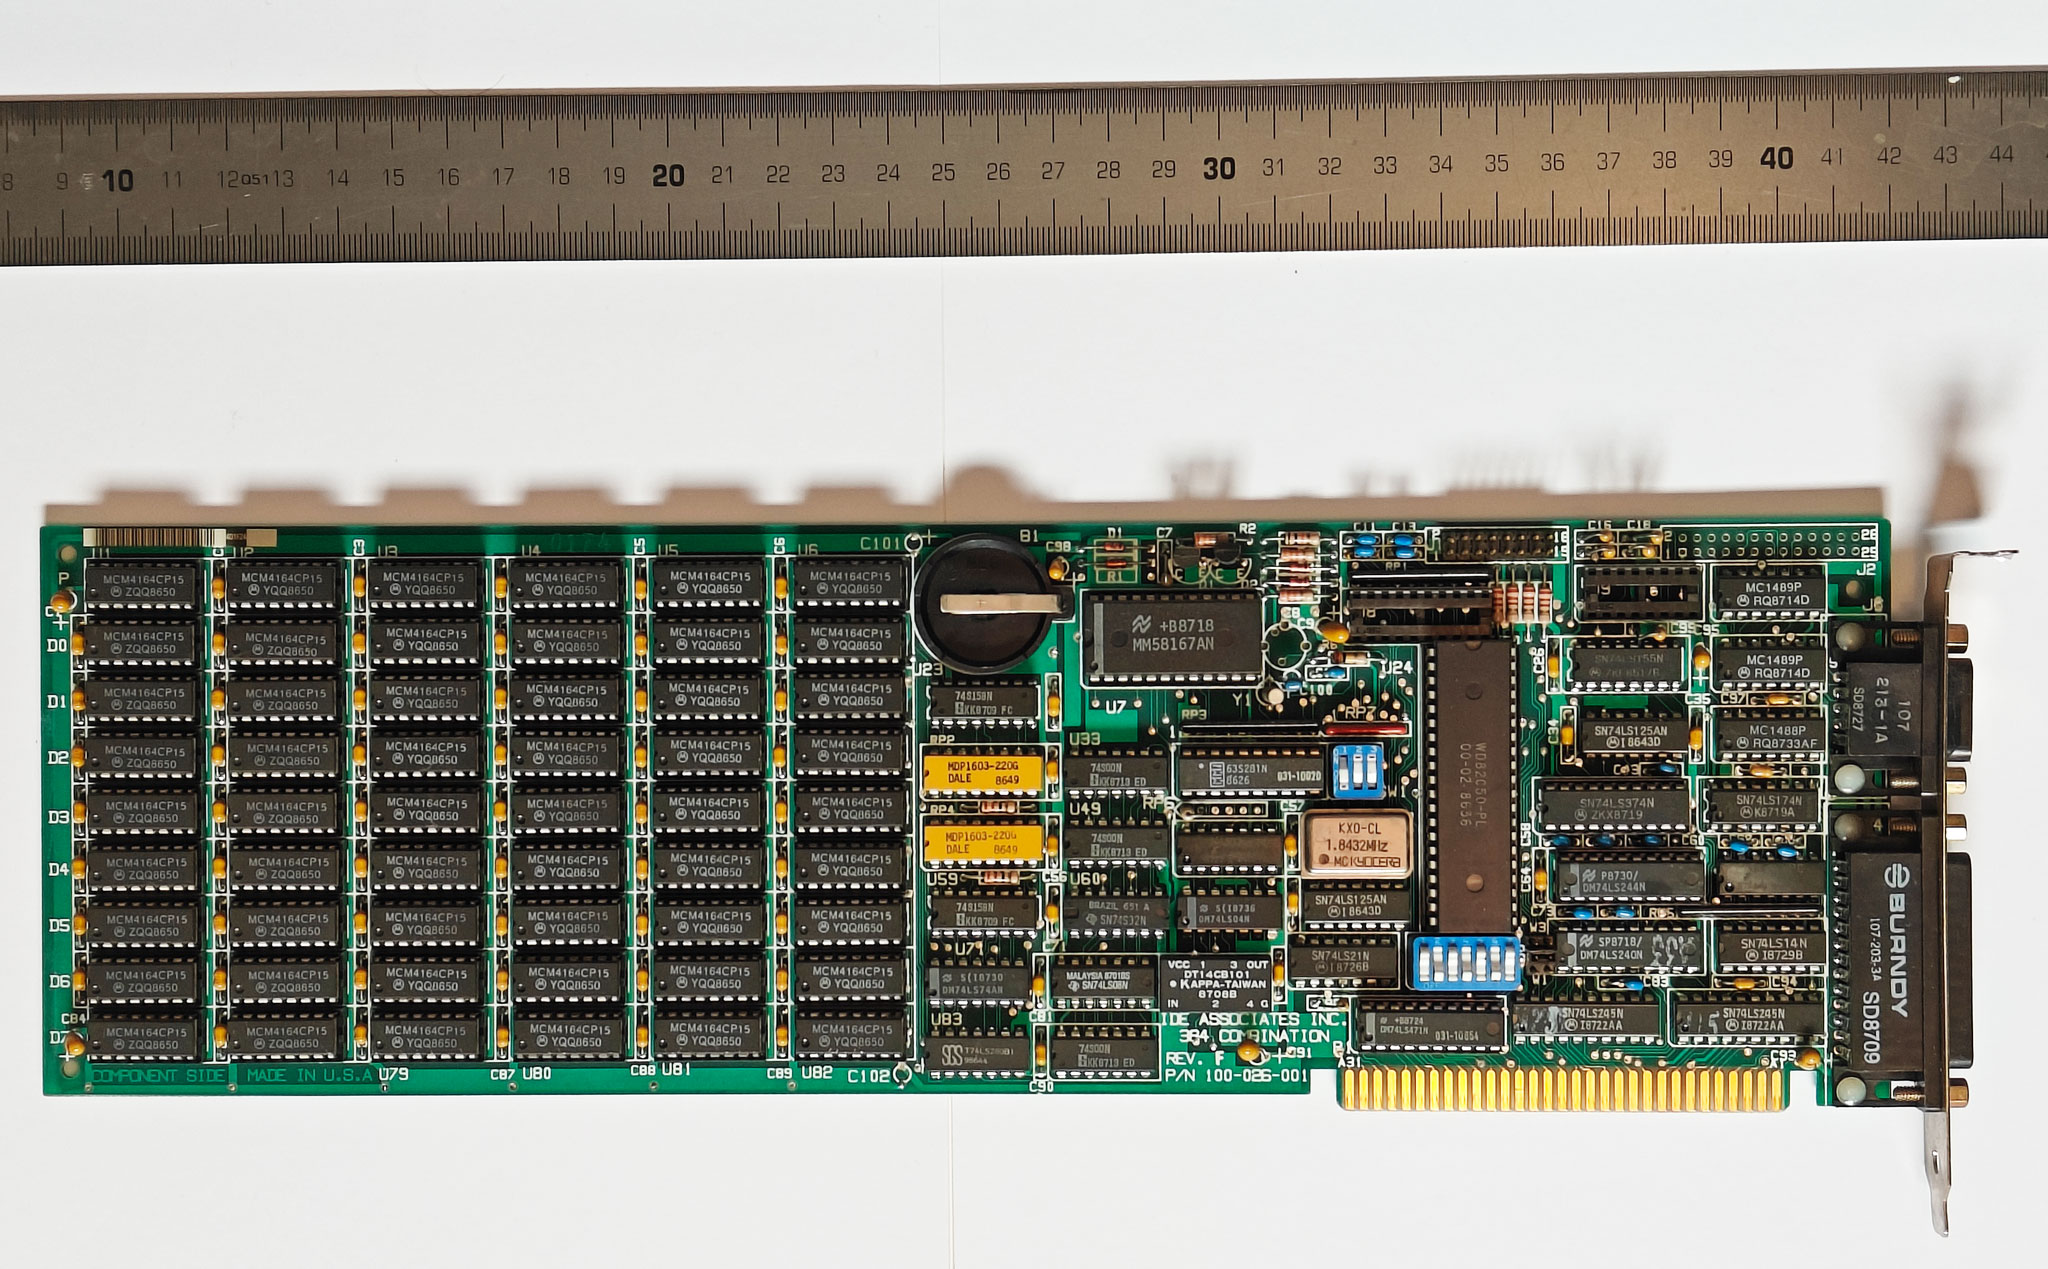
Although the PicoMem (which I have installed in my machine to emulate only a hard drive) is able to provide additional memory, my IBM 5150 came with its own memory expansion card: a “384 Combination” board from IDE Associates Inc. This 8-bit ISA card adds 384 KB of RAM to the system, which, combined with the 256 KB on the motherboard (common in later Revision B boards), brings the machine up to the full 640 KB conventional memory limit.
The “384 Combination” card is a multifunction expansion card. In addition to memory, it often included features like a real-time clock, serial and parallel ports, and sometimes a game port header. These types of cards were designed to save precious ISA slots by consolidating multiple functions onto one board. It is a nice example of the kind of clever hardware integration that was popular in the early PC era, especially in systems like the 5150 that only had five expansion slots to work with.
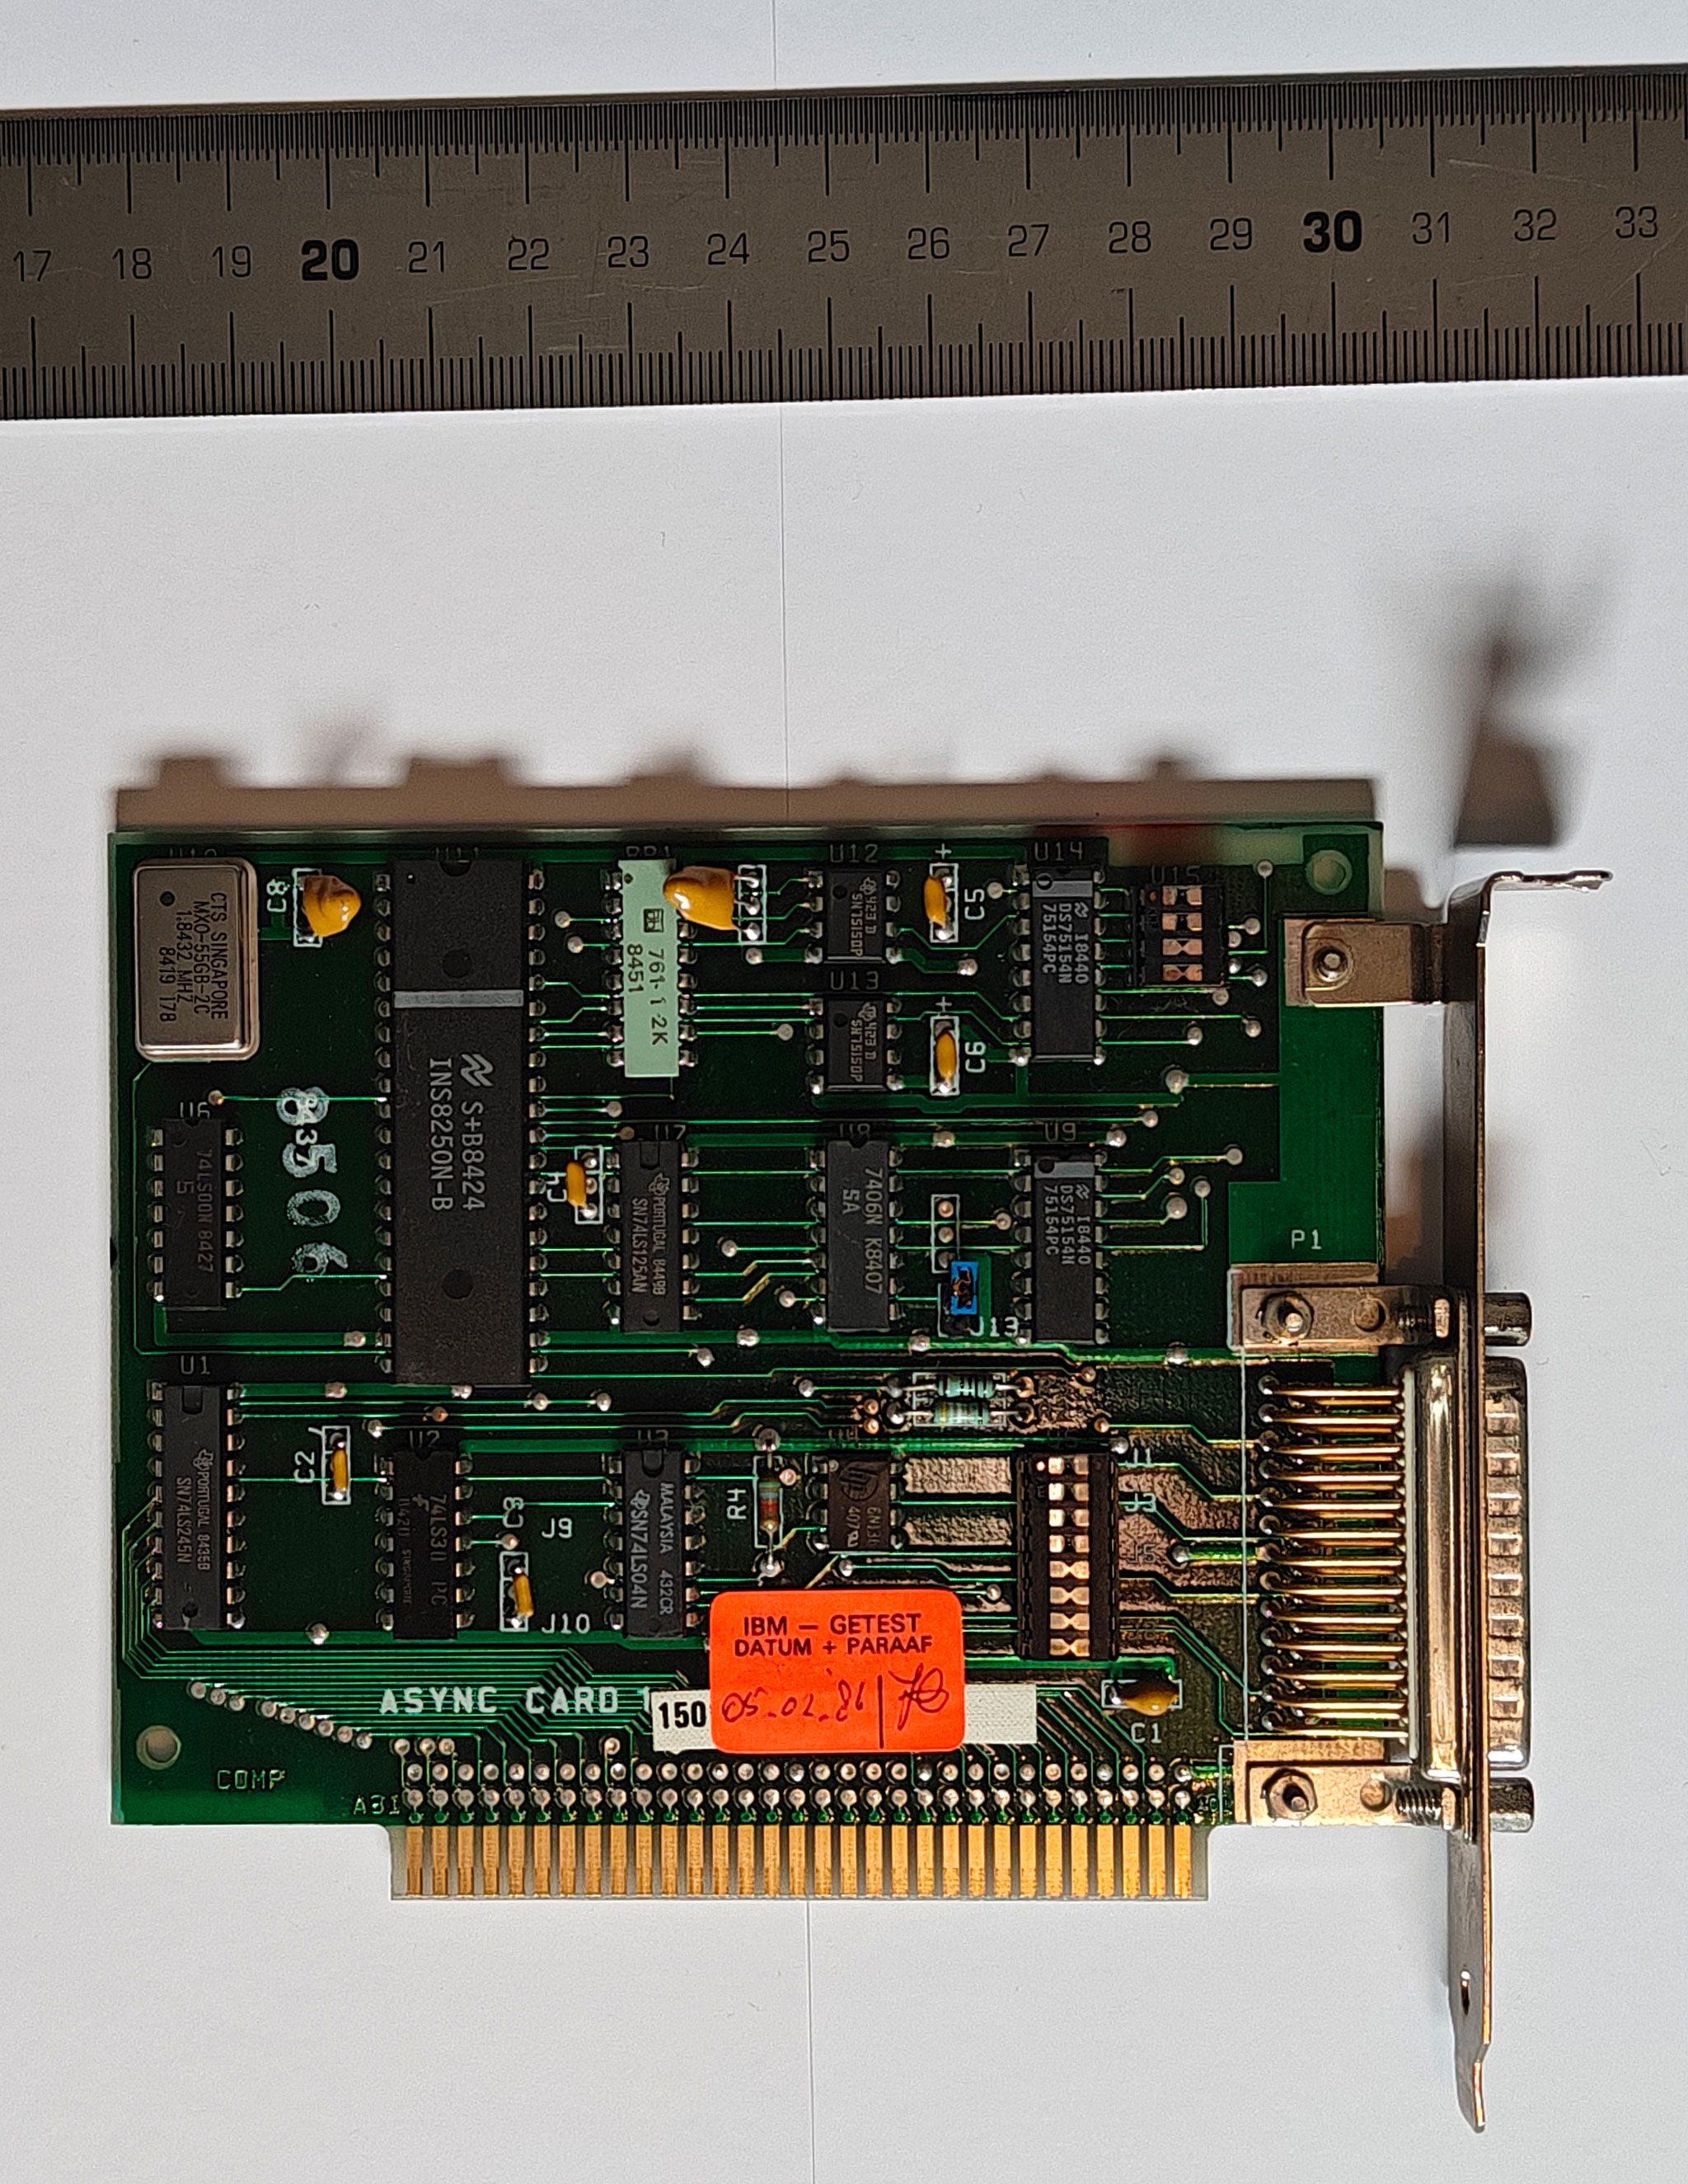
Async card#
My IBM 5150 also has an asynchronous communications (async) card installed, which I chose to keep in the system. These cards were typically used to provide RS-232 serial ports for connecting to modems, terminals, or other serial devices. While the functionality is often duplicated on multifunction cards, I decided to retain the dedicated async card for authenticity and flexibility—it still works reliably and does not take up much space in the configuration.
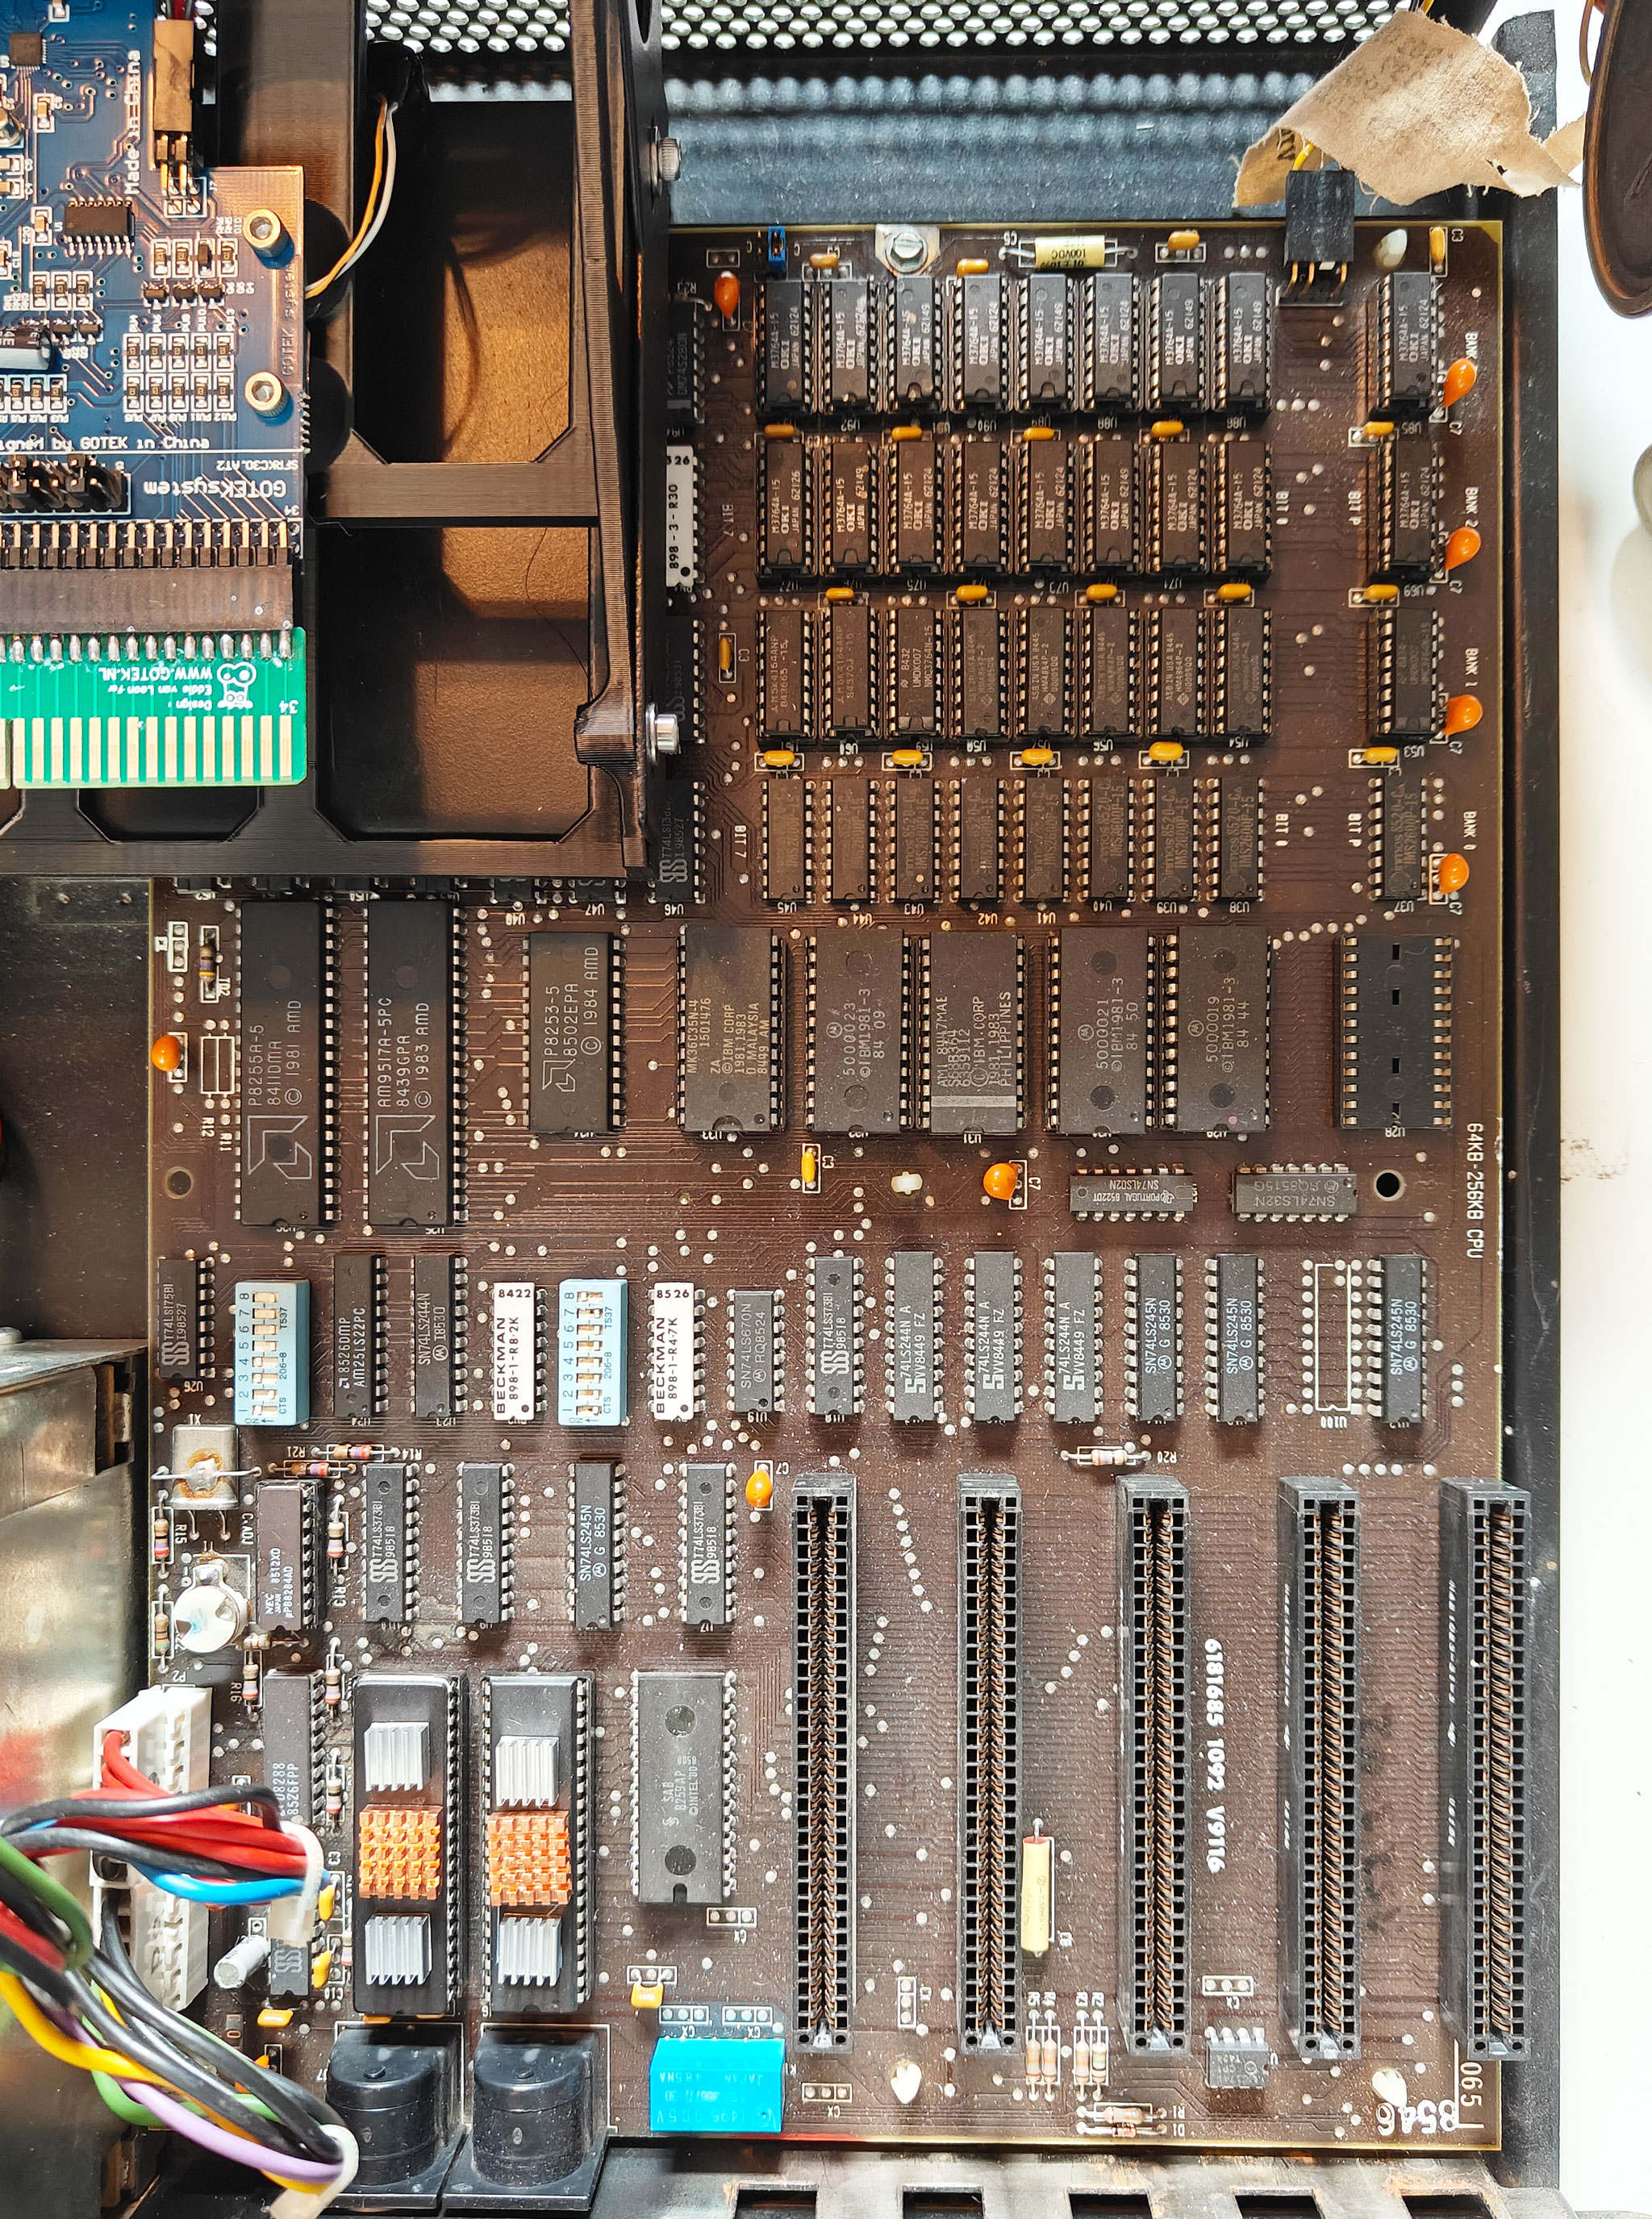
Layout#
In the image below, you can see the current layout of the expansion cards in my IBM 5150. The longer cards are installed in the middle ISA slots so that their rear brackets align with and are secured by the support slots built into the case.

Conclusion#
Restoring and modifying the IBM 5150 has been a rewarding blend of preservation and practicality. While I have made several upgrades to improve usability, like replacing mechanical drives with modern emulators and expanding memory, I have tried to stay true to the spirit of the original hardware. The result is a machine that still feels authentically vintage, yet is far more reliable and flexible for everyday retro computing tasks. For me, that balance between historical accuracy and modern convenience is what makes this kind of project so satisfying.